
As a preliminary note:
I was going to only post this on Facebook, but this tutorial seemed like the perfect opportunity to experiment with expanding my blog audience. I absolutely welcome constructive feedback while I experiment with some new kinds of writing.
This lesson will teach you how to save a video on Facebook for viewing later.
Ever come across something awesome on Facebook, but not had the time to really enjoy it? Well, fortunately, Facebook has a feature called “Saved“. This feature lets you save content, sort of like if you were bookmarking it. You can either retrieve the content later from the Saved area within the Facebook App or, if after a few days you still haven’t retrieved it, Facebook will re-serve the videos and/or links up to you in your Newsfeed, reminding you that you had wanted to view that content.
Note: these screenshots are all based off of the Facebook App on an iPhone.
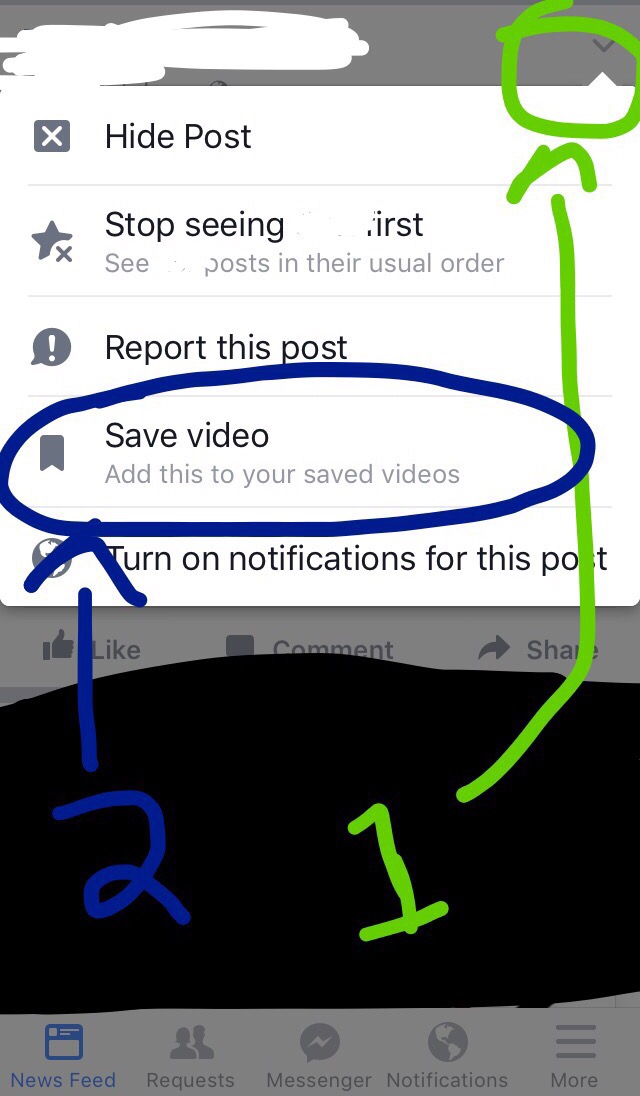
1.) In the upper right hand corner of every post, there is a downward facing “^” sign. Tap on that.
2) Tap “Save video” (for links, this will say “Save link”). Underneath, that same tab says “Add this to your saved videos”.
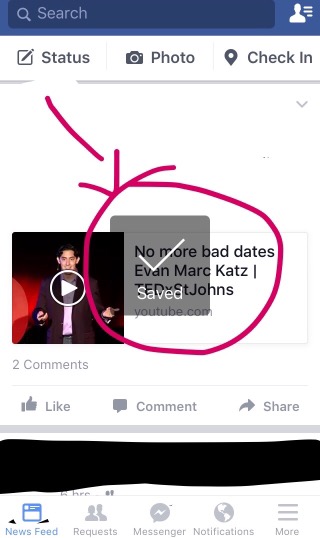
The drop-down menu will now disappear, and this pop-up screen (it’s a greyed-out square with a check-sign) will appear:
.
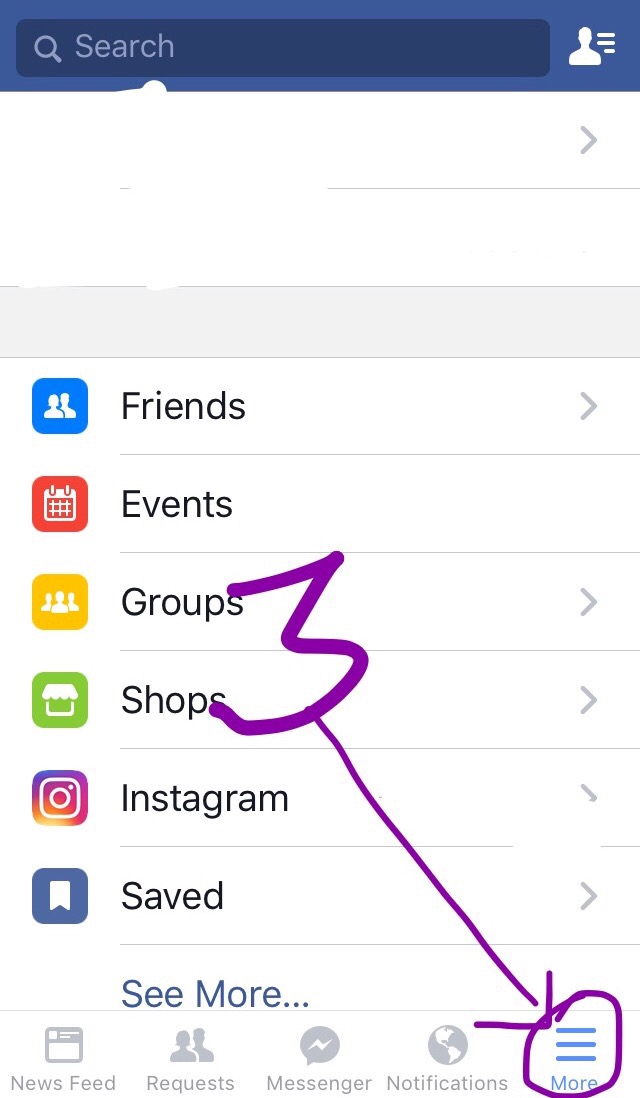
3) Now, on the bottom of the App screen, there are a series of menu options. On the bottom right, one of the options is “More”. Tap on “More”.
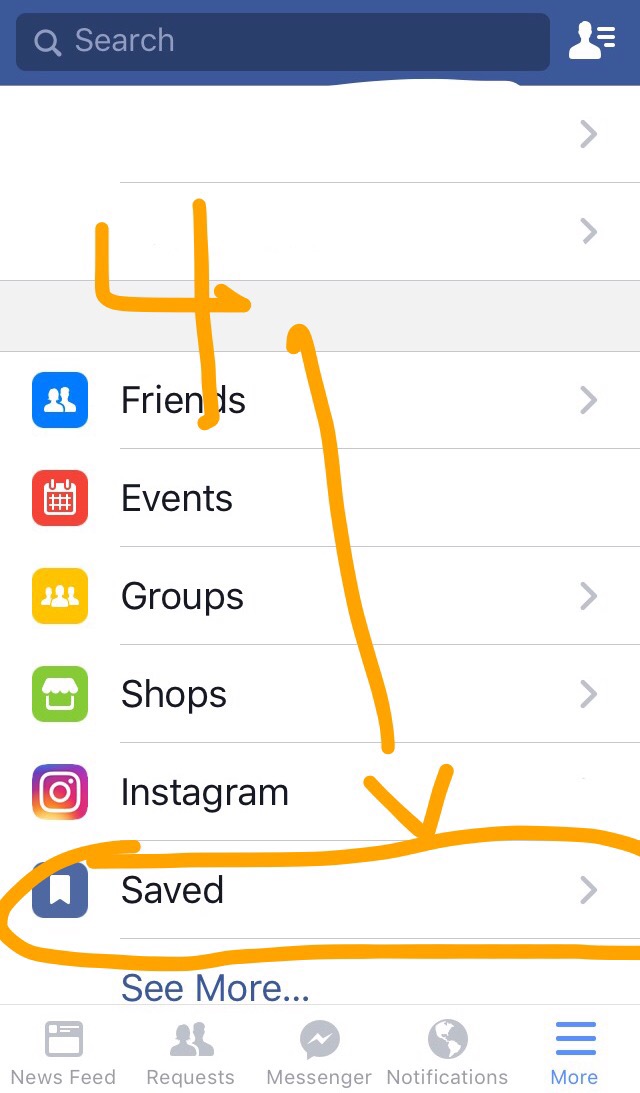
4) One of the options (your list may look different, depending on the number of Facebook pages you have) is “Saved”. Tap on “Saved”.
5) The video you just saved will show up at the top of the list. If you have saved any others, they will appear below that saved one, along with who shared the video/link originally, and when you saved the content for review.

And that’s that! Enjoy!

